Book Calendar Appointment and Send Email invitation with ICAL link
This tutorial demonstrates how to build a booking app where users can book appointments from available date-time slots and receive a calendar (ICAL) invitation in their email.
- We will use Podio App to record bookings.
- Build a ProcFu app to capture bookings from users.
- Send an email with a calendar invite on successful bookings
Podio App
- Name (Single-line text field)
- Date (Date field)
- The date field should have time enabled, but end date disabled. It should also be set to show up in calendars.
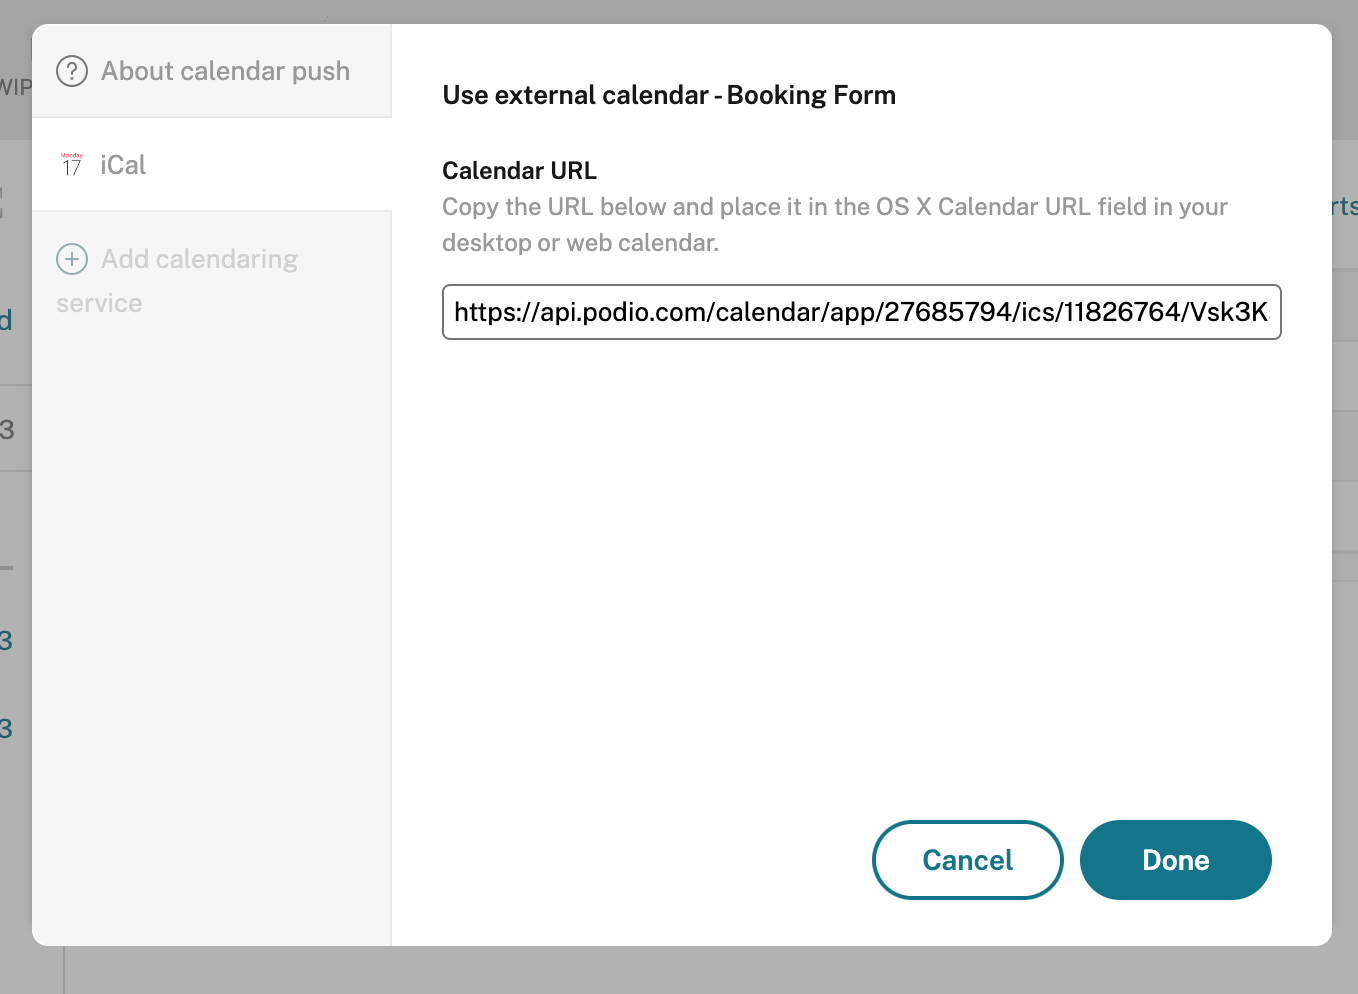
- Go to the App > Settings > Add to Calendar > iCal and copy the link you see. This will be pasted later in ProcFu.
This link helps your Podio calendar to sync with the ProcFu app.
It ensures that already booked dates are unavailable for future bookings.
- Location (Single-line text field)
- Subject (Single-line text field)
- Details (Multi-line text field)
ProcFu App Builder
- Now we will build an app where users can book an appointment.
- Create the app and give it a name.
- Next, we will give a simple header that will be displayed on all pages of this app. Add the following piece of code to the HTML header section of the app configuration
<h1 style="text-align: center; padding-top:10px; padding-bottom:10px;">Booking Form</h1>
- Next, we will create screens, we are not going to have any authentication, hence we will leave the start screen as it is and create three other screens.
- Calendar Screen (Users can book a date and time)
- Form Screen (User can fill in name and email)
- Success screen (User will be redirected after the booking)
Calendar Screen
- This is the screen where the user can book a date.
- Type: Date Picker Tool
- Set up the screen as follows.

- Busy Calendar ICAL is where you put the ICAL link copied from Podio.
- The success link of this screen will be connected to the next screen which is named ‘form’.
Form Screen
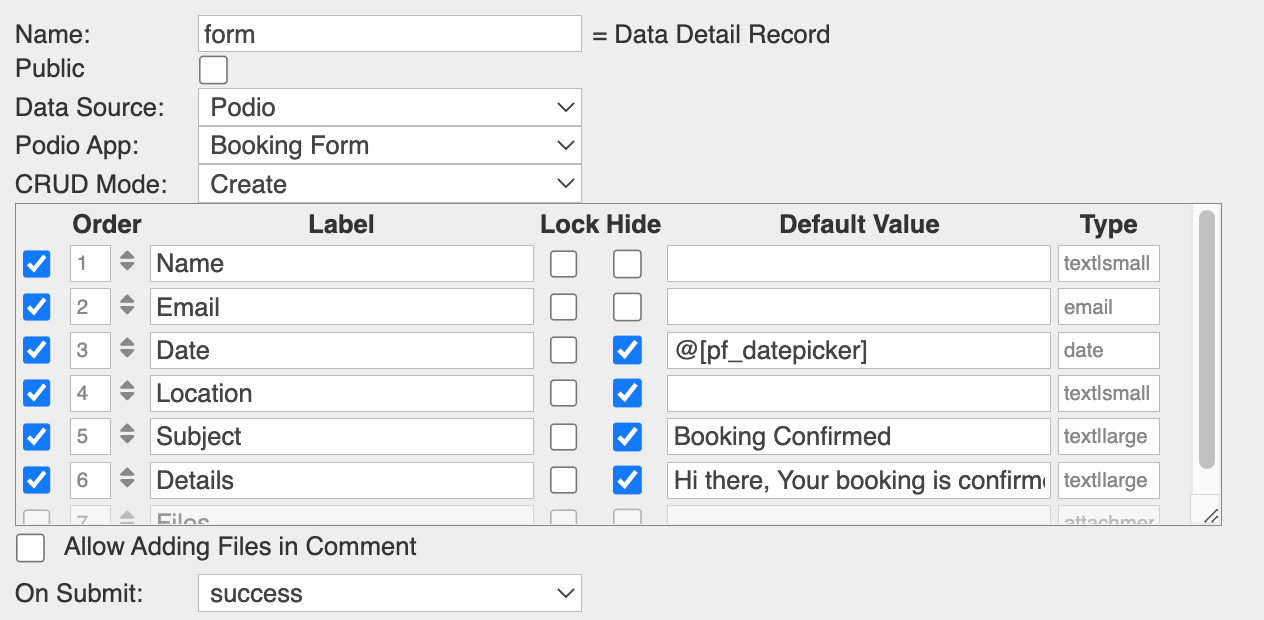
- This is the screen to add the booking details. Name it ‘form’
- Type: Data Detail Record
- Data Source: Select the Podio app we created earlier
- CRUD Mode: Create
- Set up the screen as follows.
- The success link of this screen will be connected to the next screen which is named ‘success’.
- Date, Location, Subject, and Details will be hidden from the user as they only have to fill name and email.
- The date filled will have a default value of
@[pf_datepicker]. This value brings the selected date-time value from the previous date picker tool screen.
- You can fill the subject and details field as needed.
- We will also display the date-time value that the user has selected. We will add a piece of code to the Header component to achieve that.
<script>
var date = new Date("@[pf_datepicker]").toString();
document.write("<h3>Confirm your Booking for:<br>"+date+"</h3>");
</script>
This code simply takes the date value from the date picker tool and prints it on the screen in a human-readable format.
- Next, we want the app to send an email to the user when the form is submitted. To achieve that we will add two pieces of code to the After Submit component.
- Code to create Calendar Invite (ICAL file)
let podio_item_id = item_id
let date_field_id =  241754205
let summary_field_id = 241754207
let details_field_id = 241754208
let location_field_id = 241754206
let organizer_name = "Bruce Wayne"
let organizer_email = "[bruce@wayneenterprises.com](mailto:bruce@wayneenterprises.com)"
let file_name = "invite"

let ical = PODIO_ICAL_INVITE_CREATE(podio_item_id, date_field_id, summary_field_id, details_field_id, location_field_id, organizer_name, organizer_email, file_name)
You can get the field id’s from your Podio app from Podio app > settings > developer

- Code to send the email to the user with the invite
let conn_name = "ww2"
let event_date = form_values["date"]
let email_to = form_values["email"][0]
let email_subject = form_values["subject"]
let email_body = form_values["details"]

let opt_headers = [{filename:"invite.ics",base64data:podio_file_get_base64(ical)}]

email_send_conn(conn_name,email_to,email_subject,email_body,"",organizer_email,"",opt_headers)
You can set up your email integration on the integrations page of ProcFu (https://procfu.com/account/settings/).
Currently, I have set it up there and named the connection “WW2”
- Code to create Calendar Invite (ICAL file)
Thank You Screen
- This is the screen that appears on successful booking. Name it ‘success’
- Type: Text Information Screen
- Write a thank you message in its Content section

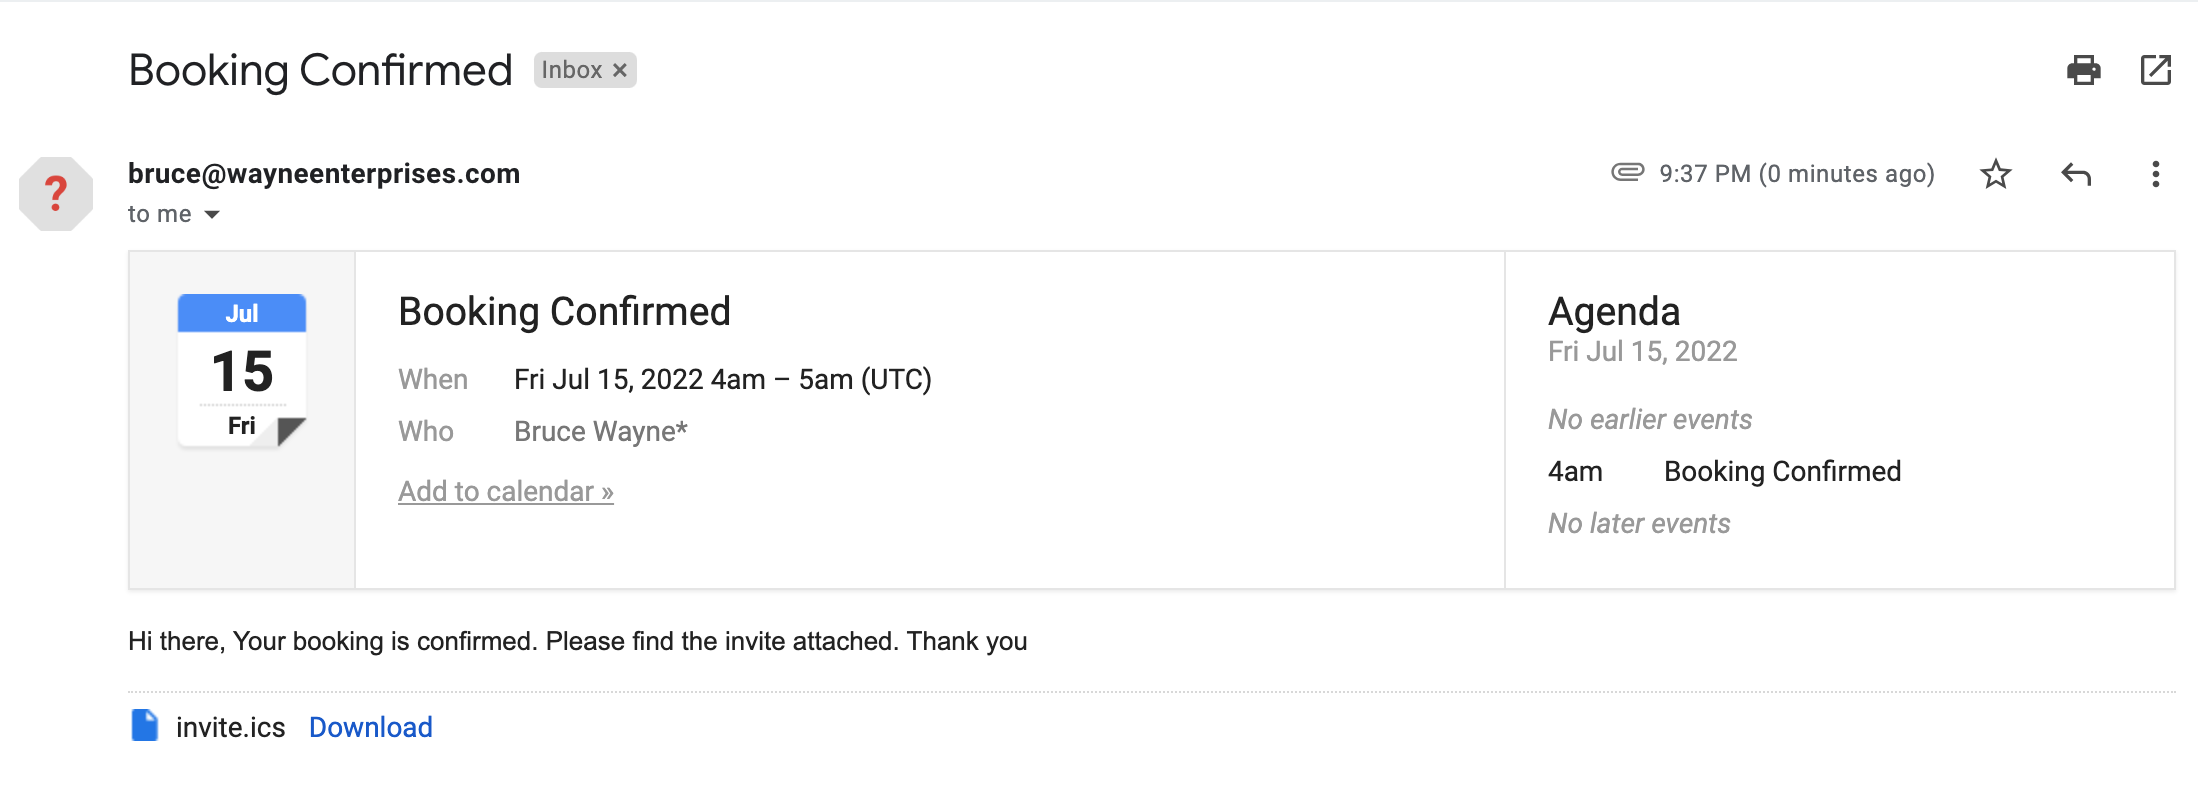
Result